こちらの記事ではOpenAIのテキストから画像を生成する『GLIDE(Guided Language to Image Diffusion for Generation and Editing)』を見てみました。
今回はその『GLIDE』を使って実際に画像を生成したいと思います。
ソースコードはこちらです。
ただし、こちらはGLIDE(filterd)ということで複雑なキャプションには対応していません。
ですので、DALL-Eの論文にあったような「an illustration of a baby daikon radish in a tutu walking a dog(バレリーナの衣装を着て、犬の散歩をする赤ちゃん大根)」といった画像はうまく生成できないようです。
ですので、ここでは実際に『GLIDE』を使ってどういう風に画像を生成するのか、を軽く見てみる感じです。
このような比較的単純な画像はうまく生成されます。

今回は、classifier-free guidanceのGLIDEですが、他にもCLIP guidanceや、inpaintという塗りつぶされた箇所をキャプションに従って補完する、といったこともできますので、またの機会にご紹介したいと思います。
(DALL-Eについてはこちらをご参照)
『GLIDE』の使い方
まず、classifier-free guidanceのGLIDEでは、glide-text2imをインストールします。
!pip install git+https://github.com/openai/glide-text2im
パッケージをインポートしていきます。
PIL、torchなどの一般的なパッケージをインポートします。
from PIL import Image
from IPython.display import display
import torch as th
続いて、text2imで必要なパッケージをインポートします。
from glide_text2im.download import load_checkpoint
from glide_text2im.model_creation import (
    create_model_and_diffusion,
    model_and_diffusion_defaults, # 画像生成用diffusionモデルの設定
    model_and_diffusion_defaults_upsampler # アップサンプリング用diffusionモデルの設定
)
load_checkpointは保存されている学習済みモデルを取得するものです。
create_model_and_diffusionはモデルを生成するための関数です。
model_and_diffusion_defaultsおよびmodel_and_diffusion_defaults_upsamplerはそれぞれモデルの設定が入っています。
model_and_diffusion_defaultsは通常の画像生成のためのdiffusionモデル、model_and_diffusion_defaults_upsamplerは64x64ピクセルで生成された画像を256x256にアップサンプリングするためのdiffusionモデルの設定です。
とりあえず、model_and_diffusion_defaultsに入っている設定を見てみましょう。
- attention_resolutions: '32,16,8'
- diffusion_steps: 1000
- dropout: 0.1
- image_size: 64
- inpaint: False
- noise_schedule: 'squaredcos_cap_v2'
- num_channels: 192
- num_head_channels: 64
- num_heads: 1
- num_heads_upsample: -1
- num_res_blocks: 3
- resblock_updown: True
- super_res: False
- text_ctx: 128
- timestep_respacing: ''
- use_fp16: True
- use_scale_shift_norm: True
- xf_final_ln: True
- xf_heads: 8
- xf_layers: 16
- xf_padding: True
- xf_width: 512
timestep_respacingというパラメータが、画像生成時のタイムステップになっています。
デフォルトでは''と空になっていますので、あとで設定します。
では、モデルを作成します。
options = model_and_diffusion_defaults()
options['use_fp16'] = has_cuda
# 100ステップで生成する
options['timestep_respacing'] = '100'
model, diffusion = create_model_and_diffusion(**options)
デフォルトのモデル設定からtimestep_respacingを100として、画像生成時は1000ステップではなく100ステップにしています。
解説記事にも書きましたが、\(\Sigma_\theta\)を固定値ではなく、ニューラルネットワークで求めるようにしたことで、少ないステップで画像の質を落とさず生成することができます。
そして、モデルのパラメータを読み込みます。
model.eval()
if has_cuda:
    model.convert_to_fp16()
model.to(device)
model.load_state_dict(load_checkpoint('base', device))
GPUでも結構時間がかかるので、Google ColabなどでGPUを使用した方が良いです。
続いて、アップサンプリング用のdiffusionモデルについても同様に、モデルを作成しパラメータを読み込みます。
options_up = model_and_diffusion_defaults_upsampler()
options_up['use_fp16'] = has_cuda
options_up['timestep_respacing'] = 'fast27'
model_up, diffusion_up = create_model_and_diffusion(**options_up)
model_up.eval()
if has_cuda:
    model_up.convert_to_fp16()
model_up.to(device)
model_up.load_state_dict(load_checkpoint('upsample', device))
print('total upsampler parameters', sum(x.numel() for x in model_up.parameters()))
画像表示用の関数を用意します。
def show_images(batch: th.Tensor):
    """ Display a batch of images inline. """
    scaled = ((batch + 1)*127.5).round().clamp(0,255).to(th.uint8).cpu()
    reshaped = scaled.permute(2, 0, 3, 1).reshape([batch.shape[2], -1, 3])
    display(Image.fromarray(reshaped.numpy()))
では、表示させたい画像のキャプションなどを設定しましょう。
とりあえず、論文にも載っていた"a hedgehog using a calculator(電卓を使うハリネズミ)"を設定しておきます。
# キャプション、バッチサイズ、スケールパラメータ、アップサンプリング時の
# 画像の鮮明さのパラメータを設定
prompt = "a hedgehog using a calculator"
batch_size = 10
guidance_scale = 3.0
upsample_temp = 0.997
guidance_scaleはclassifier-free guidanceのスケールパラメータ\(s\)です。
batch_sizeを変えることで複数の画像を生成することができます。
続いて、promptに設定されたキャプションをトークナイズ(単語のIDに変換)し、options['text_ctx']で指定された長さ(ここでは128単語)にパディングします。
maskはパディングされた部分がTrueになるようになっています。
# キャプションをトークナイズ
tokens = model.tokenizer.encode(prompt)
tokens, mask = model.tokenizer.padded_tokens_and_mask(
    tokens, options['text_ctx']
)
classifier-free guidanceでは、キャプションを与えない画像を生成し、それをキャプションを与えた画像の方に誘導していきました。
そのためのキャプションを与えない画像のためのtokenをnullとして設定します。
# nullデータを作成
full_batch_size = batch_size * 2
uncond_tokens, uncond_mask = model.tokenizer.padded_tokens_and_mask(
    [], options['text_ctx']
)
uncond_tokensはダミーのみです。
モデルに渡す引数を設定します。
# モデルに渡す引数を設定
model_kwargs = dict(
    tokens=th.tensor(
        [tokens] * batch_size + [uncond_tokens] * batch_size, device=device
    ),
    mask=th.tensor(
        [mask] * batch_size + [uncond_mask] * batch_size,
        dtype=th.bool,
        device=device,
    ),
)
条件付き画像生成のためのキャプションと条件なしの画像のためのキャプション(null)をくっつけています。
続いて画像を生成するための関数を用意します。
# 画像を生成する関数
def model_fn(x_t, ts, **kwargs):
    half = x_t[: len(x_t) // 2]
    combined = th.cat([half, half], dim=0)
    model_out = model(combined, ts, **kwargs)
    eps, rest = model_out[:, :3], model_out[:, 3:]
    cond_eps, uncond_eps = th.split(eps, len(eps) // 2, dim=0)
    half_eps = uncond_eps + guidance_scale * (cond_eps - uncond_eps)
    eps = th.cat([half_eps, half_eps], dim=0)
    return th.cat([eps, rest], dim=1)
条件なし・条件ありの両方の画像を同時に生成するために、2つのインプットを連結して処理しています。
最後に以下のコードで64x64の画像を生成します。
model.del_cache()
samples = diffusion.p_sample_loop(
    model_fn,
    (full_batch_size, 3, options["image_size"], options["image_size"]),
    device=device,
    clip_denoised=True,
    progress=True,
    model_kwargs=model_kwargs,
    cond_fn=None,
)[:batch_size]
model.del_cache()

# 画像の生成
show_images(samples)
"a hedgehog using a calculator(電卓を使うハリネズミ)"というキャプションでは、こんな感じの画像が生成されました(最初の5個だけ表示しています)。
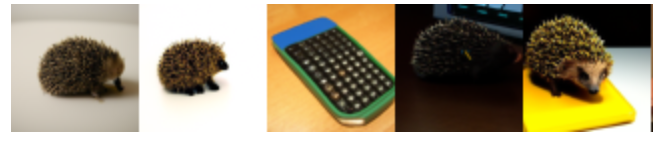
電卓を使うハリネズミなのに、ハリネズミ単体、もしくは電卓単体が生成されました…
スケールパラメータを何度か調整しましたが、これといった画像は生成されませんでした。
フルで学習したGLIDEではないので仕方がないのですかね。
一旦簡単な画像として「a illustration of a tiger(トラのイラスト)」として生成してみます。

確かに色んなトラのイラストが生成されますね。
続いて、64x64の画像を256x256にアップサンプリングします。
# キャプションをトークナイズ
tokens = model_up.tokenizer.encode(prompt)
tokens, mask = model_up.tokenizer.padded_tokens_and_mask(
    tokens, options_up['text_ctx']
)

# モデルに渡す引数の設定
model_kwargs = dict(
    # Low-res image to upsample.
    low_res=((samples+1)*127.5).round()/127.5 - 1,

    # Text tokens
    tokens=th.tensor(
        [tokens] * batch_size, device=device
    ),
    mask=th.tensor(
        [mask] * batch_size,
        dtype=th.bool,
        device=device,
    ),
)

# 画像の生成
model_up.del_cache()
up_shape = (batch_size, 3, options_up["image_size"], options_up["image_size"])
up_samples = diffusion_up.ddim_sample_loop(
    model_up,
    up_shape,
    noise=th.randn(up_shape, device=device) * upsample_temp,
    device=device,
    clip_denoised=True,
    progress=True,
    model_kwargs=model_kwargs,
    cond_fn=None,
)[:batch_size]
model_up.del_cache()

# 画像の出力
show_images(up_samples)
以上のコードを実行し、256x256にアップサンプリングした結果がこちらです。
ぼやけていた画像が鮮明になってなかなかいいですね。
では次にpromptを"a photo of a tiger(トラの写真)"にして実行してみましょう。
ちゃんとイラストではなく写真になりましたね。

では、次のキャプションで画像を生成してみます。
”an illustration of a slime(スライムのイラスト)”
以下の画像が生成されました。
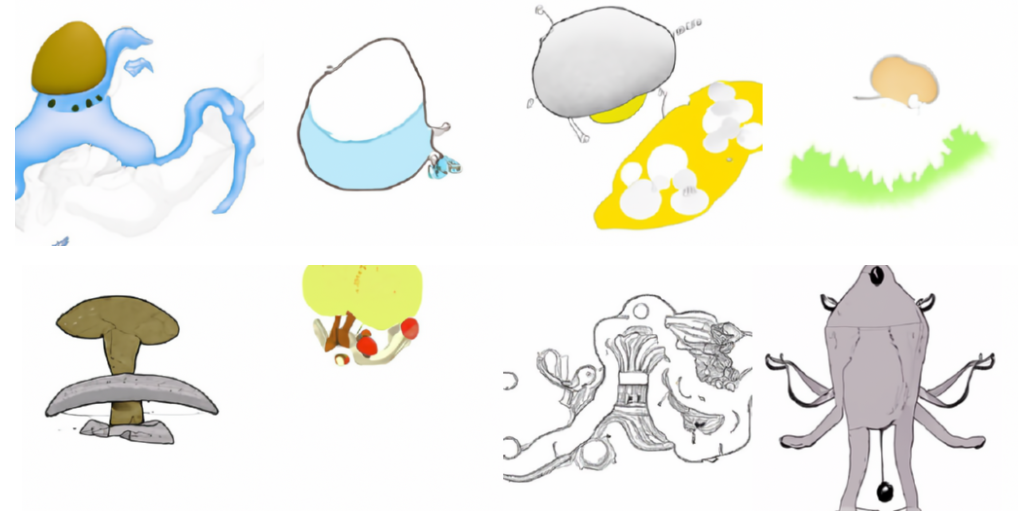
何これ…(笑)
最後にしつこいですが、ドラクエつながりで、こちらをイメージしてキャプションを設定します。
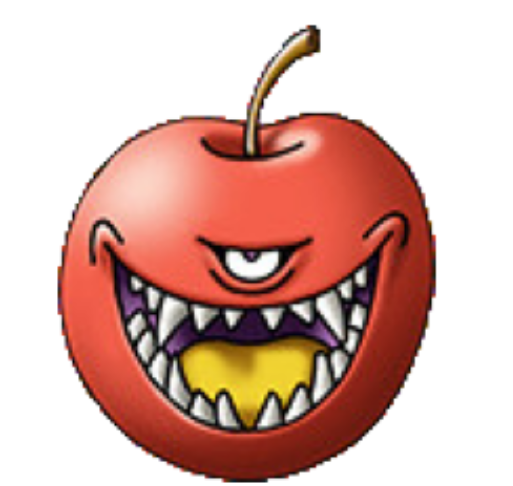
"a monster like an apple(リンゴのような怪物)"
以下の画像が生成されました。

...
まとめ
今回はOpenAIの『GLIDE』を使ってみました。
フルで学習したモデルではないので、画像を生成して楽しむというよりは、どういうものかを見てみるぐらいのものですね。
またCLIP guidanceなどを試してみたいと思います。
では!!